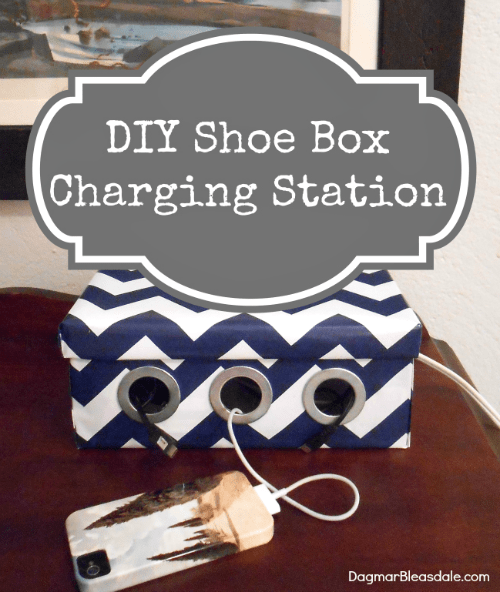
If you are like me, you’re always looking for all those charging cables for your phone, iPad, and other devices. Well, search no more!
I upcycled a shoe box that otherwise would’ve landed in the trash, and with a little bit of craftiness, I build myself this charging station.
No more unsightly cables everywhere, and they are all in one spot in this stylish tech organizer!
Please use caution: only plug in the chargers for the time of the charge, don’t connect too many chargers at one time, and disconnect the extension cord from the outlet when not in use to avoid overheating the box.
DIY Shoe Box Charging Station
Charging Station Supplies:
- shoebox
- wrapping paper in your preferred pattern
- paper glue
- X-Acto knife
- metal grommets or metal rings
- pencil or pen
- optional: glue gun
I couldn’t find grommets big enough to fit the ends of the chargers through it, so I had to improvise and bought metal rings that I mounted on the outside of the box to reinforce the hole.
If you can get large grommets, I’d suggest using them.
DIY Charging Station Tutorial:
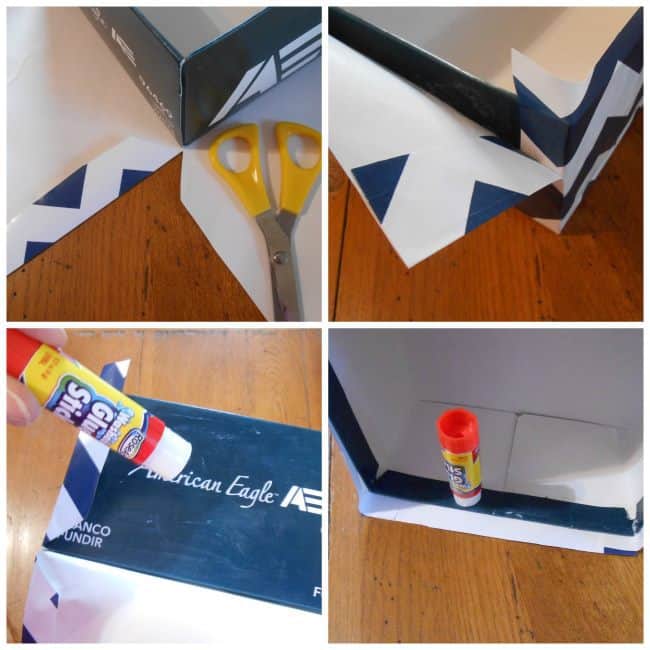
- Place the shoebox on top of the wrapping paper and cut off enough of the paper so that you have enough extra to cover the outside, plus another inch or so on the inside.
- Cut out four sections on all corners of the box to create a kind of “cross” look, making sure you leave an extra inch of wrapping paper.
- Cut a small slit toward the corners of the box and fold the excess paper to the inside on the narrower sections.
- Apply glue to the first longer side of the shoe box and wrap the paper around it, and around the corner to the narrower side. Repeat on the other side.
- Then cover the narrower side of the box with glue and push the narrower wrapping paper up to cover the wrapping paper that came around the corner, and then do the other side.
- Cut off excess wrapping paper, but leave an inch of it so you can glue it over the edge to the inside for a nicer finish.
- Apply glue to all four sides of the inch of paper sticking past the top of the box. Then push the paper down against the inside of the box.
- Now wrap the top of the box in wrapping paper.
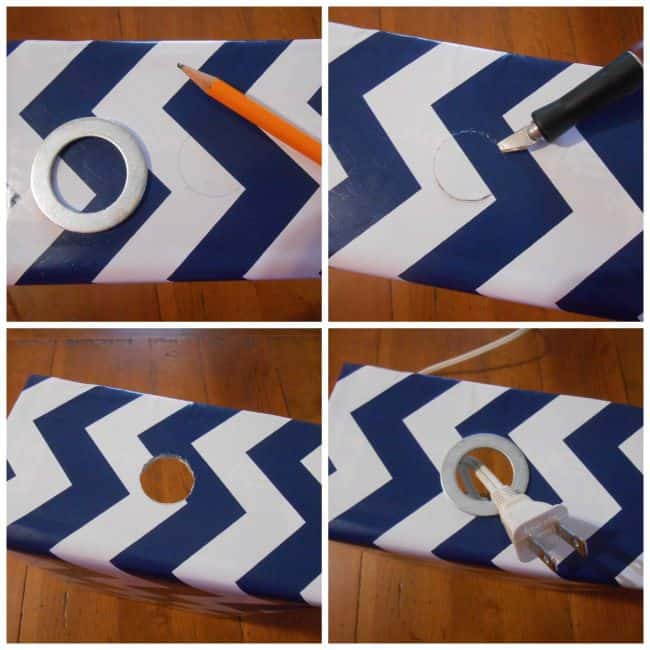
- Take the grommets or metal rings and trace the inside with a pencil or pen where you want to place the holes.
- Cut out the holes with an X-Acto knife.
- Attach the grommets. In my case, I used glue to secure the metal rings to the outside of the box. You could also use a glue gun.
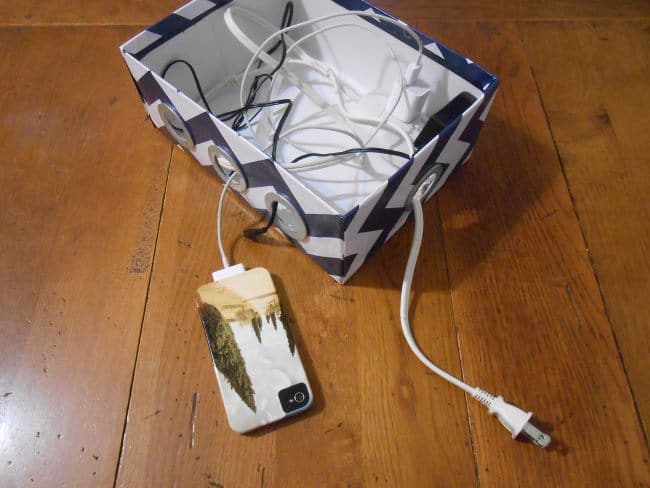
- Now, put an extension cord with several outlets into the box and push the end of the cord through one of the holes.
Now you just need to find a spot for your new charging station!
Could you use a charging station?
If you want to see all of my other DIY posts, check out my DIY page.


